Rheological Creep Test Simulates Sag and Leveling Phenomena

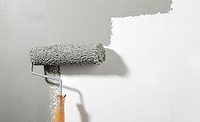
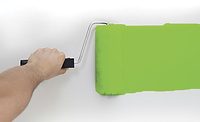
“Creep” is the technical expression used to describe deformation or flow of a material under a constant force. When paint is applied to a horizontal surface with a brush, lines created by the bristles are visible immediately afterwards. Within a short amount of time, the lines may disappear and leave a perfectly smooth surface. This flow behavior is referred to as “leveling”. When paint is applied on a wall with a brush, paint droplets may suddenly coalesce and appear to slide down the wall. This flow behavior is referred to as “sag”. Leveling is desirable, whereas sag is not. Paint manufacturers must evaluate new formulations for these characteristics to confirm that flow performance will satisfy customer expectations.
Gravity is the force in play that affects the flow behavior of paint in the above examples. It is a relatively small force compared to the brushing action that applies the paint to the horizontal and vertical surfaces. Flow behavior of paint during sag and leveling phenomena takes a longer time to occur compared to quick brushing action when painting. Rheological tests that properly characterize sag and leveling must mimic these conditions – namely a low force level applied to a paint sample over an extended time interval – to confirm that performance of the paint formulation is acceptable.
A controlled stress rheometer is the instrument of choice for conducting the appropriate experiments because it can apply a quantitative force like gravity to the paint sample. Figure 1 shows a cone and plate rheometer, which uses a cone spindle to test paint placed on a temperature-controlled surface on the instrument called the “sample plate”. Choice of cone spindle (Figure 2) depends on the amount of sample available and the expected viscosity range. A large-diameter cone spindle (75 mm) is necessary for low-viscosity paints, while a small diameter (25 mm) can better handle high-viscosity paints. Required sample volume is 2 mL or less, which is ideal for tempering the test sample quickly before running experimental tests.

FIGURE 1 » Controlled stress cone and plate rheometer.

FIGURE 2 » Examples of cone spindles.
The test method involves applying a constant stress to the paint sample using the controlled torque capability of the instrument. After conditioning the paint sample on the plate at desired temperature with the spindle in place, the rheometer motor imparts a rotational torque to the spindle with low-level force equivalent to gravity. Movement of the spindle is recorded by an optical encoder inside the instrument, which measures the amount of rotation relative to initial start position as a function of time. Shearing action on the paint sample is monitored, and data output includes displacement of cone spindle and equivalent shear rate vs. time.
Figure 3 shows graphical data from a creep test on two different paint samples. The x-axis is time in seconds, and the y-axis is strain, which is calculated as rotational movement of the cone spindle relative to its initial position at the start of the test. The shape of the curves explains what happens to movement of the paint sample when the force is applied over an extended time interval. Upward climb of the curves indicates initial movement in reaction to application of low-level force. The top curve continues to climb, which shows that creep movement is taking place. The bottom curve moderates (starts to flatten out) after a short time interval, and negligible cone rotation results. If the curve were to go completely horizontal, this would indicate no further rotation of the spindle. Stress within the paint sample due to chemical bonding would be strong enough to resist continuing rotation of the spindle.

FIGURE 3 » Graph of creep behavior for two paint samples.
The creep test is a standard method used by many R&D departments in the paint industry to qualify new formulations. Quality control (QC) departments have focused primarily on the use of shear rate and yield stress measurements for pass/fail tests. Some companies have started to use creep measurement in QC for premium paints with superior performance capability. Fast-setting paints, for example, must self-level quickly so that surface appearance has that smooth, even quality expected by customers. Controlled stress rheometers are definitely the critical tool needed to confirm this performance and can be found in growing numbers in not only R&D, but now QC departments as well. They are more expensive than standard bench viscometers, but offer added test capability with creep measurement, yield stress determination and faster cycle time on standard shear rate tests. The investment will pay back easily within the first year of use.
Looking for a reprint of this article?
From high-res PDFs to custom plaques, order your copy today!


